Finding the right professional to handle your plumbing jobs can be a real job on its own. Many times, those who portray themselves as professional plumbers end up doing a shabby job. And then the thought hits you, cant you even do this yourself? Well, you can. And that is why Tile and Bath Co-created this article to help you figure it out. We will start with how you can efficiently remove and replace your worn-out kitchen tapware.
This article is not meant to downplay the job of a professional plumber. Instead, it creates an alternative to getting the job done through a DIY approach. Moreover, you cannot execute all tasks with the DIY system; eventually, you may still need a professional plumber for some functions. However, replacing your old worn-out tapware may be one of such tasks that you can do yourself. This article will guide you on a stepwise method of executing the job.
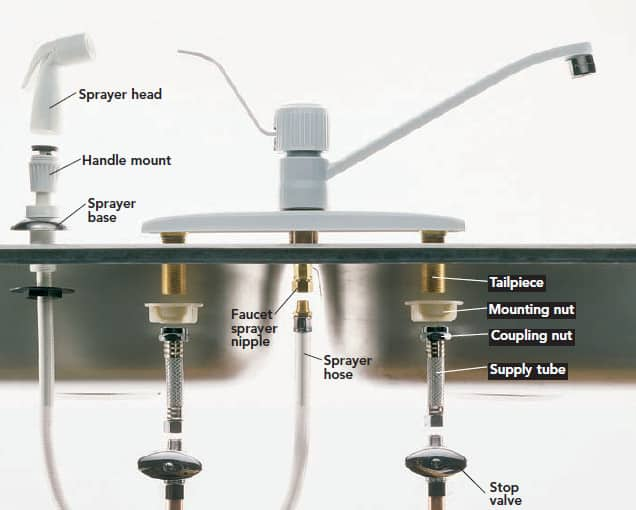
However, kindly note that you should first prepare by doing your homework as easy as the job is. Identify all the tools that we would recommend and use them rather than improvising. You will find fantastic help through this article, but you must be careful to follow it through. Let us first consider some of the core tools that you need to replace kitchen tapware.
Essential Tools you need to replace your kitchen tapware
When you finally decide to fix your kitchen tapware by yourself, specific tools have to be handy. For instance, if you do not have any of the devices with their specified sizes at hand, you may first have to get to the nearest store to buy them. Some are cheap while others are not. Meanwhile, if you have a friendly neighbor, depending on your relationship, you may also borrow the common ones, such as the plier or adjustable wrench. Here is the list
- Open-ended spanners
- Adjustable wrench
- A-Basin wrench
- Washing bowl
- Pipe cutter
- Compression fittings or check valves
- Slotted screwdriver
- Hacksaw or olive splitter
- A cleaning cloth
- Adjustable Pliers
- Towel
- PTFE tape
- Back nut box spanner
- Limescale remover
- Masking tape
- Joining compound
- vBox spanner or ratchet
- Pen
Note that professional plumbers use other tools apart from the tools above. Nevertheless, we only include the ones above that are useful for the task, which is replacing your tapware. Now, let us delve deeper.
4 Steps to remove your kitchen Tapware
People often like to use the space under the sink to store certain items in the home. If you are one of them, it is time to remove any item around that area to create more space. Creating space is also essential to access the pipe connectors. Click here to read about How to Pick the Best Statement Tapware for Bathroom Transformation.
Step 1 – Turn off the Water supply
The first step is to cut off the water supply to the zone where you are about to work. First, you need to locate the isolating valve that leads to the pipe supply to the tapware. At times, it is directly on the hoses’ output. Moreover, if you cannot find it, go to your primary water supply source and turn off the valve for now. Turn the valve a quarter way to stop water from keeping on flowing. Check the tap if the water has stopped flowing. When sure, proceed to the next step.
Step 2 – Prepare the area of work
Spread out a towel on the floor under the sink and lay down all the tools you plan to use. If you have the old kitchen tap manual, you may need it in the disconnection. In addition, if there is anyone around who can help you pick one or two things from the line of tools, you should call them.
Step 3 – Disconnect the tap from the main water supply
Water pipe connections come in two ways; standard and flexible ones. The traditional hose system requires you to loosen up the connecting screw that joins the two ends of the pipe. An open-handed spanner will execute the job. And prepare that some residual water can come out as you disconnect. On the other hand, a flexible pipe connection requires loosening the nuts that join the primary pipe connection or fitted isolator valves. A pair of adjustable pliers can keep the valve or connection in place while you lose the nut. You need to hold it firmly and prepare for a tight loss due to the length of time it had remained.
Step 4 – Remove the old tapware
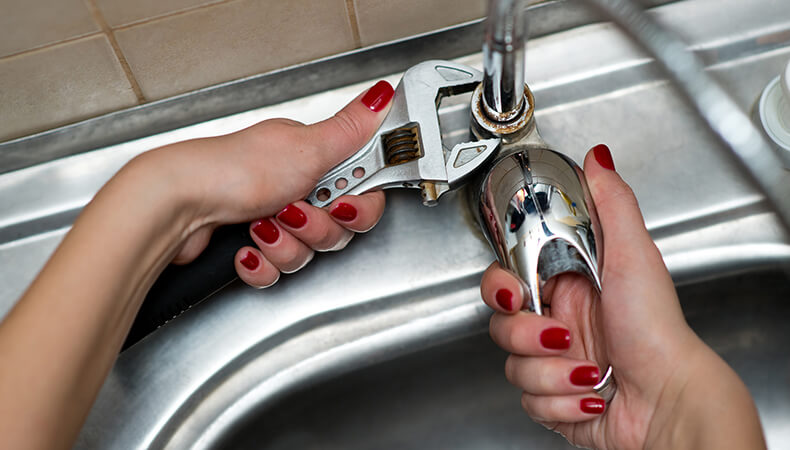
It is now time to remove the old tapware by loosening the nut keeping the connection to the surface. After losing it, pull it and keep it in a secure place. While removing, ensure it is not rotating, or else there is no work done. In some connections, you may have to detach the tap with all the flexible hoses. After removal, clean off any residue in the pipes on both ends under the sink.
How to fit in a new Kitchen tapware
Congratulations on your successful removal of the old tapware. The next four steps will teach you how to fix a new one for your kitchen water supply. Meanwhile, ensure you get reliable tapware from Tile and Bath Co for all home interior needs in Australia.
Step 1 – Clean the mounting surface
The first action is to clean the surface from where you removed the old kitchen tapware. If some of the stains are hard to remove, take your time but don’t apply any harsh chemicals or brushes to the surfaces.
Step 2 – Mount the new kitchen tap
Depending on the type of kitchen tapware you have to fix as the new one, you can apply the standard individual pillar or the bridge combination. First, apply up to 5 layers of the PTFE tape to the lower threads of the primary connection. Wrap the tape in a clockwise direction for better firmness, then gently fit it into its place. If it proves difficult, consult the manufacturer manual of the new one. Do not also forget to connect the hoses. You need someone to hold the tap in place while you screw it in to prevent the faucet from rotating. In addition, you can screw the nut first by hand before tightly it with adjustable pliers.
Step 3 – Reconnect the main water supply
Now that we reverse our previous steps reconnect the main water supply to the newly fitted tapware. First, start the thread by hand to ensure it remains in place and there is no cross-threading. Continue to tighten it gently while holding the connector or valve in place.
Step 4 – Turn on the water supply
Now that the installation is complete, it is time to test how well you have worked. So, turn on the main water supply. While the water is running, first see if there is no leakage along the pipe up to the tapware. Then, you can now open the kitchen tapware to see if the water runs perfectly. You can also verify the water pressure if it is the same as it used to be.
Conclusion
On a final note, instead of paying a professional plumber, you can now successfully replace an old kitchen tapware. Do not forget that you need a trusted retailer such as Tile and Bath Co to get high-quality tapware. Moreover, depending on your level of skills, it doesn’t take too much time to complete the whole process. Good luck.

